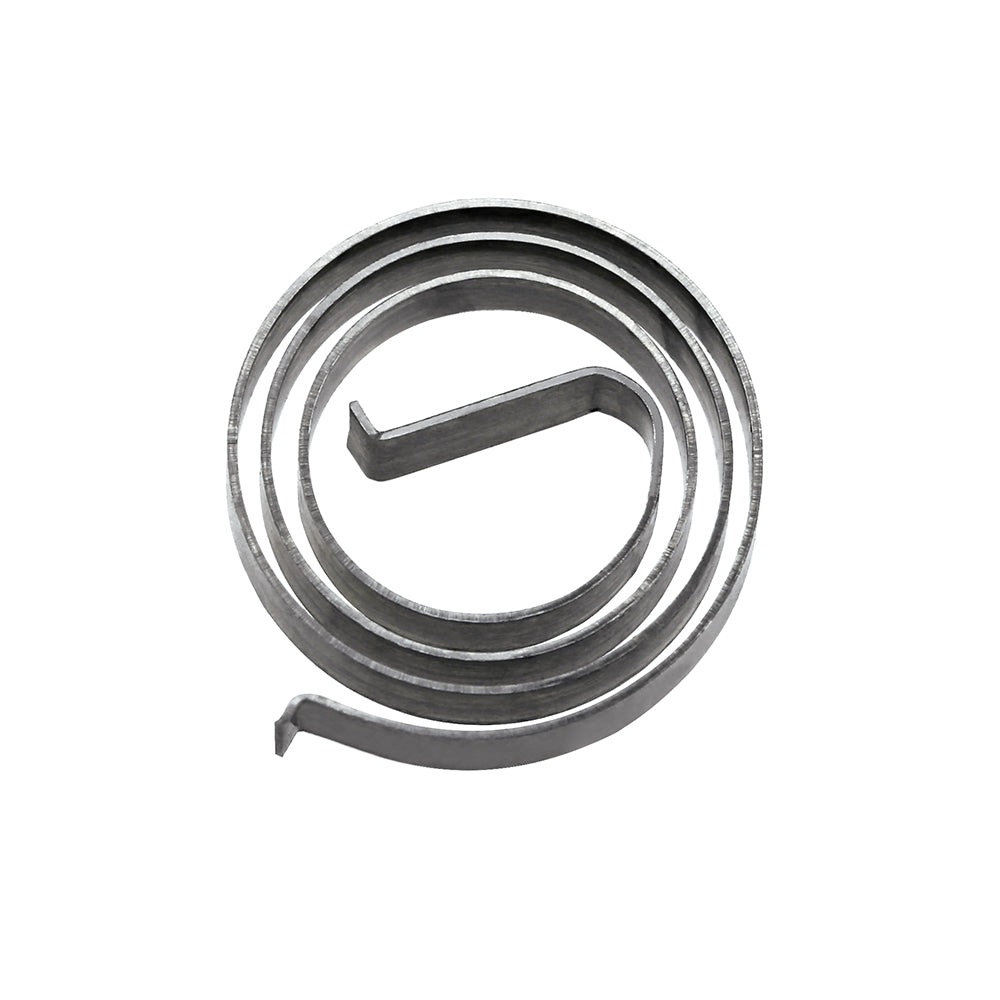
Visual Indicator Spring
Tax is only included for UK purchases. Shipping calculated at checkout
From £49 to the UK or £199 Worldwide
Visual indicator spring for the Tempest
This is the innovation part. Mad Heaters is the first to successfully implement a functional heat dynamic Visual Indicator in a manual vaporizer.
This component is a delicate steel coil/spring, sensitive to heat, to bend and can rust with bad conditions.
Please, don't heat the VI housing directly and watch out for possible dust/particles/anything (tiny crumbs, leather bits...), who could enter inside the Visual Indicator housing and make the VI not function properly.
Also, keep in mind when cleaning, that the VI spring and the click discs are more subjects to flash rusting.
Dry them with a slow Tempest heat cycle, and don't let them in a high humidity air environment for long-term storage.
For long term storage, I use a Vitamin C effervescent tablet plastic tube, with some desiccant salt inside the lid, to store all my Tempest small spare parts.
The Visual Indicator makes reheating the Tempest head simpler without going too far in temperature, but it's not foolproof either.
User still needs to take into account how much heat there is still at the ball section of the Head, or where the user applies heat and its intensity (thermal lag).
Results will be different if the heating position or intensity, the outside temp, the ball material change, or even between Wand IH model for example.
From a cold Tempest, the user could stop heating at the third VI notch to achieve high temp. Then, for a consecutive next bowl the reheat has to be shorter, like the second VI notch.
With the 2.5mm ø zirconia balls (stock config), I stop heating to the third VI notch for one heating cycle half bowl. I like to stop at the second VI notch for multiple reheats, and slow full bowl sessions.
The Tempest will still work without the VI or the audible click discs, but it will require a much more involved heating method from the user, like using a timer.
MH chose to make the heater rebuildable by the user.
Installing a new VI correctly will be difficult for dexterity issues people, you are warned.
If you think you can't handle this repair, just don't do it, take pictures from the manual or FCforum and get help from a handier person, a jeweler for example.
It could be wise to contact CS with a picture of the VI housing, before any repair attempt.
To work correctly, the VI has only one way to sit inside the Visual Indicator Housing.
Mad Heaters did several photos and videos to explain the VI coil replacement.
Firstly, there is only one way to install those components correctly; click discs, VI pointer and VI coil/spring inside the VI housing.
Click discs concave shape go in this way: Screw head, [_ )(__VI pointer & coil, Induction sleeve and Cap, Bowl.
VI pointer slide, one side at the time only in one way, flat side touching the click disc and the small flat head screw will help center them.
One important step before starting the coil assembly, is to make sure to position the Visual Indicator Pointer stays at the cold temperature/start position.
Ceramic tweezers are used to maintain the spring tension, when reducing slightly (not a full turn) the diameter of the coil to fit inside the VI housing.
Being delicate when applying more tension to the coil/spring is essential, screwing it to tight will damaged/deformed it, just enough (half a turn) to insert and catch, the outer leg bent extremity, with the slot/rectangular side hole, on the inner side wall of the VI housing.
Then, let the VI coil take back its original shape/tension without moving the VI Pointer. The inner leg of the coil will need to be secure between the two small posts and the wall before the screw of the VI Pointer.
From here, the coil shouldn't need a full turn to catch the inner leg into the VI Pointer. Just a tiny rotation, to fit the VI coil end between the VI Pointer post.
If during the process the VI pointer has moved from its start/cold position, the center of the coil will need to be slightly lifted up to make the correct adjustment.
Again, being delicate to not bend it is essential.
Install correctly, between the inner leg and the outer leg, the coil has 4 spire/turn.
Some users did find that a precise bending near the inner leg was required if their VI Pointer can't turn until the third notch on the VI housing.
